Open-source software, commercial off-the-shelf hardware, and paper ballots.
This guide walks you through the complete process to set up, test, and operate the voting system on election day. If you have questions, please don't hesitate to reach out to the VotingWorks team by emailing [email protected] or calling (510) 426-9991.
System Overview
VotingWorks consists of two subsystems:
Central System: all equipment necessary for, election programming, central batch ballot scanning, results tabulation, and reporting.
Precinct System: all equipment necessary for use at the precinct to scan hand-marked paper ballots.
Central System
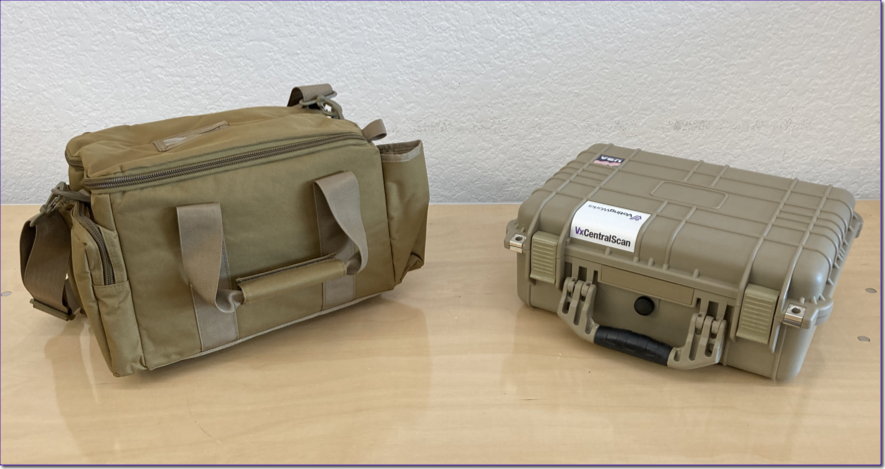
VotingWorks Central System includes two components:
VxAdmin: the main tool for local election administrators, which programs elections, tabulates and reports results on election night.
VxCentralScan (optional): a central scanner used for rapidly scanning absentee or vote by mail ballots.
Precinct System
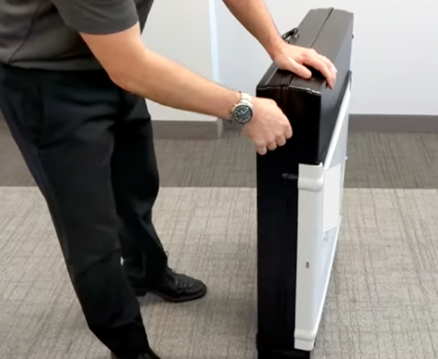
The VotingWorks Precinct System is based around VxScan, which isa voter-facing precinct scanner that scans paper ballots and notifies voters of ballot issues for second-chance voting. All of the scanning components come in a tamper evident suitcase and the ballot box collapses.
Paper Ballots
All votes cast using VotingWorks equipment are on paper ballots for security and post-election auditing.
All absentee or vote by mail voters will receive a paper ballot to hand mark. Absentee ballots may be scanned by election administrators using a high-speed central scanner (VxCentralScan) or the precinct scanner (VxScan).
Most in-precinct voters will receive a paper ballot that is printed by a print vendor to hand mark. Precinct ballots are scanned by voters using a precinct scanner (VxScan).
Central System: VxCentralScan (left) and VxAdmin (right)
Collapsed VxScan & Ballot Box
Assembled VxScan & Ballot Box
Example Paper Ballot
VxAdmin Hardware Setup
Part of the Central System, VxAdmin is used by local election administrators to program elections, print ballots, and tabulate results on election night.
Hardware Overview
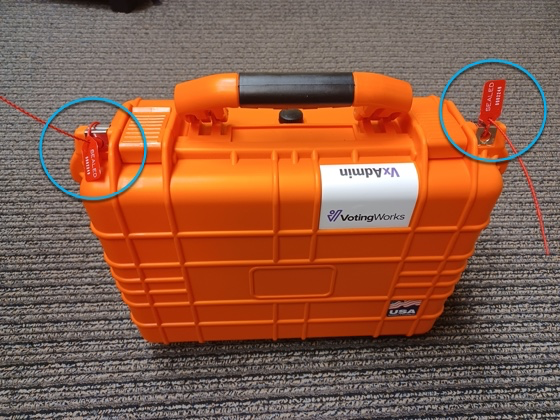
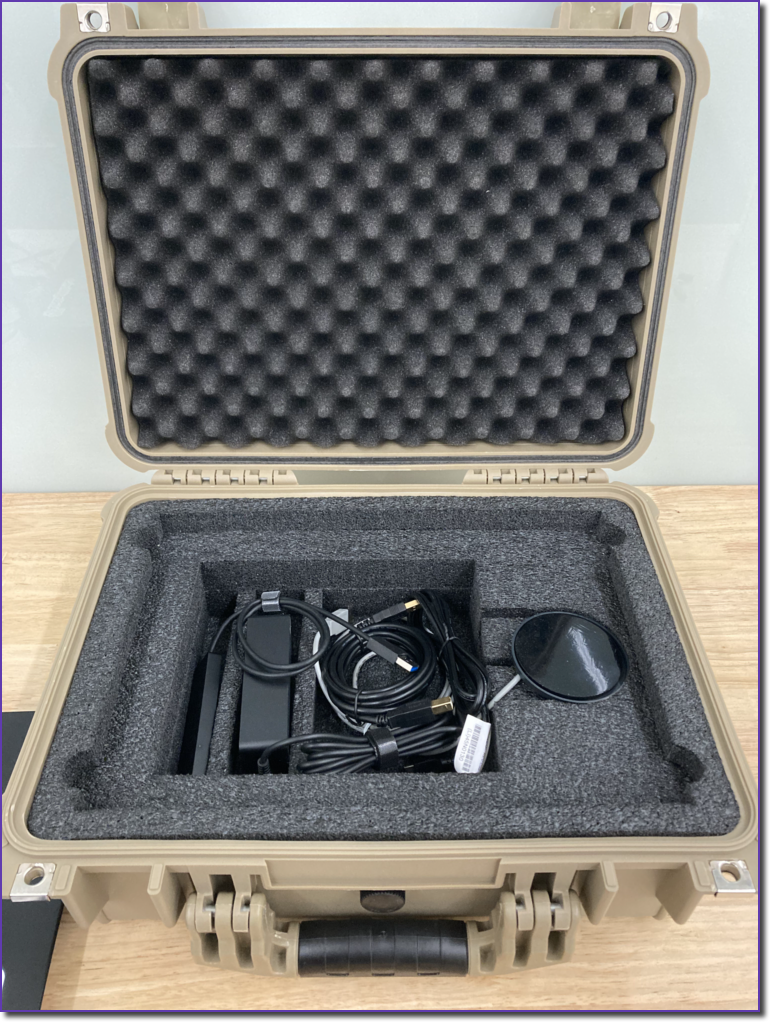
VxAdmin is a commercial off-the-shelf (COTS) laptop pre-installed with VotingWorks software and an optional printer. All USB drives, cords, adapters, and programmable smartcards needed to operate the system are included and stored in an orange case.
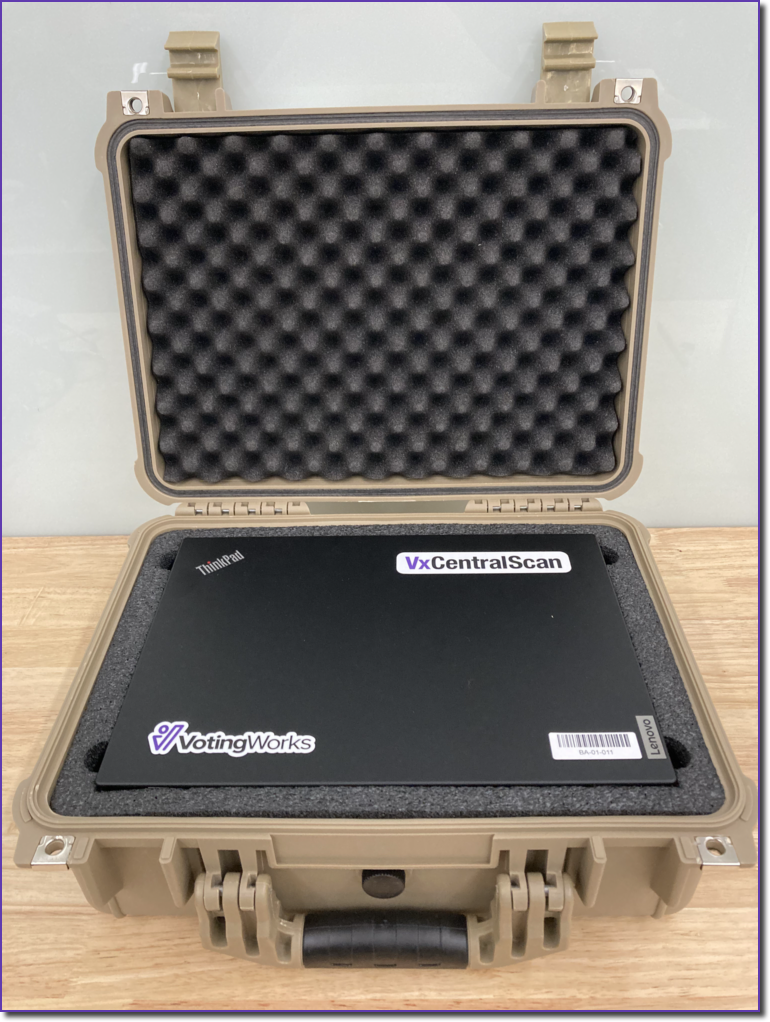
VxAdmin stored in case
VxAdmin set up
VxAdmin Setup
VxAdmin can be set up through the following steps:
Unbox and Setup Printer:
2. Setup VxAdmin laptop:
VxAdmin hardware setup is complete.
Packing Up VxAdmin
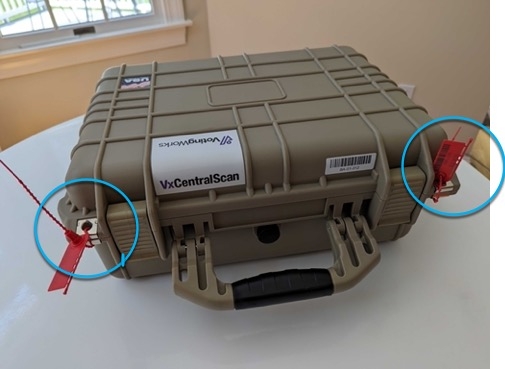
To pack up the VxAdmin, simply place all of the components back into the case as displayed above. Secure the case as required by placing at least one seal through the eyelets highlighted below.
plug the power cord into an outlet
Remove printer and power cord
Plug the power cord into printer and an outlet
Press the power button to turn on
Remove and document seals as necessary
Open the case by lifting the latches
Remove laptop
Remove components
Plug components in
L&A Overview
Logic & accuracy testing (L&A) is meant to ensure that every component of the voting system is operating as expected and has been configured properly for a specific election. Testing rules vary by jurisdiction and/or state. The following functions may be useful as tests are conducted.
VxAdmin Tally Report
Before starting the testing process, using an Election Manager Card, confirm VxAdmin does not have CVRs loaded. Select Reports from the side menu and select Full Election Tally Report to print a "zero" report.
Test Ballot v. Official Ballot Mode
VxScan and VxCentralScan can be placed into Test Ballot Mode to only accept test ballots. If official ballots are used for testing, Official Ballot Mode should be used. VxScan and VxCentralScan default to test mode after configuration.
In VxScan, insert an Election Manager Card, select Configuration from the side menu, and select the correct mode.
In VxCentralScan, insert an Election Manager Card, select Settings from the side menu, and select Toggle to Official Ballot Mode.
Unlocking/Locking Hardware
Unlocking
VxAdmin and VxCentralScan require users to use a smart card and a PIN to log in. Both machines have a smartcard reader slot in the lower left hand side of the laptop.
Both machines will display Machine Locked when turned on. To unlock the machine, insert your Election Manager or System Administrator Card into the smartcard reader. Enter the smartcard PIN and remove your card.
Locked screen
Insert smartcard in card reader
Enter PIN
Locking
Lock the machine by selecting Lock Machinein the upper right hand corner of the screen. Each machine should be locked when not in use.
VxAdmin
VxCentralScan
USB Formatting
The following steps must be completed by the System Administrator.
Before using a USB drive, whether it's brand new or has been used in a previous election, it should be formatted.
In VxAdmin, select Settings from the side menu and select Format USB.
Confirm you want to format the USB drive by selecting Format USB and confirming by selecting Format USB again. Formatting the USB drive will delete all files on the USB drive.
VxAdmin will then confirm your USB drive is ready for use. Repeat this step for all other USB drives.
System Administrator Functions
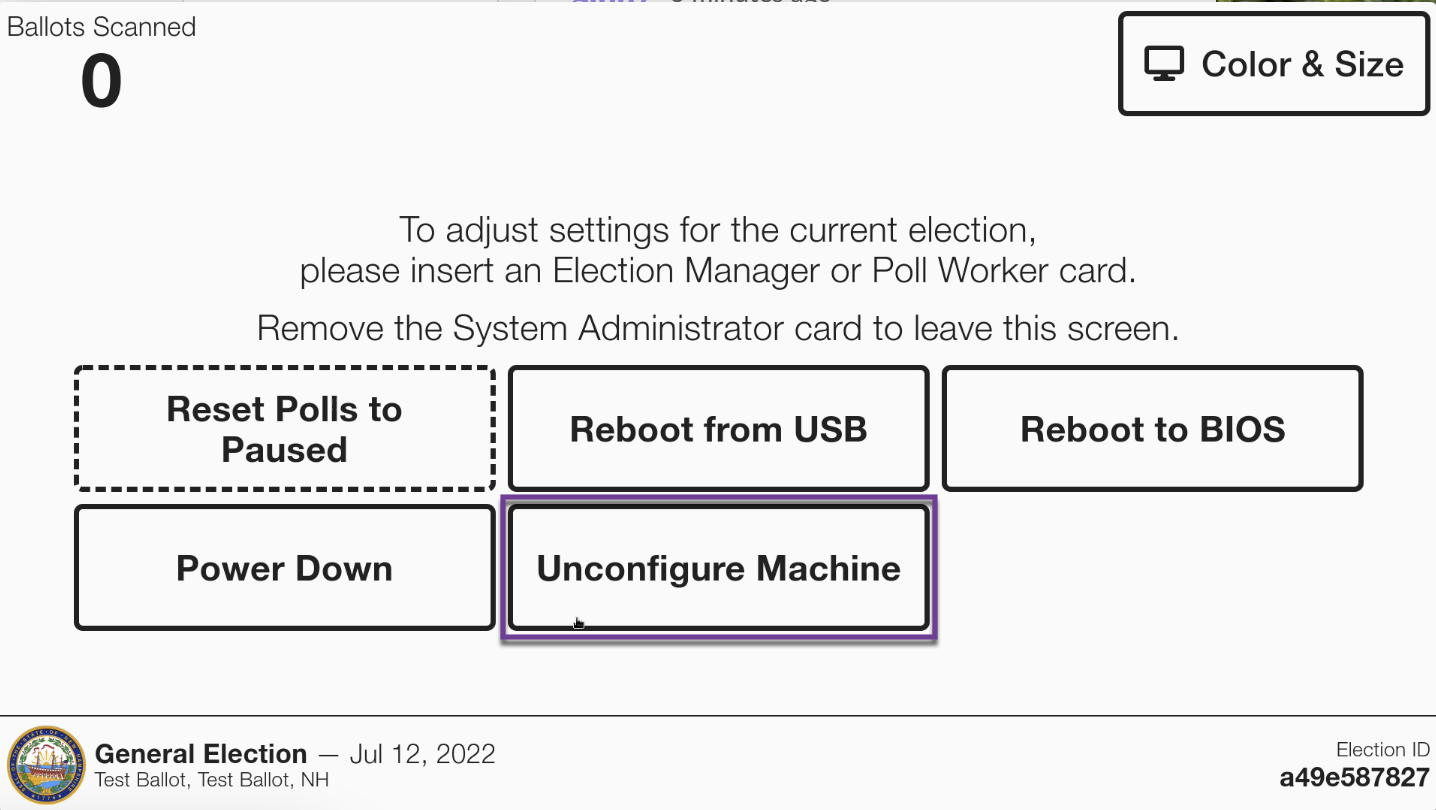
A few functions in VxScan are limited to System Administrators and only appear in a menu with use of a System Administrator Card.
Reset Polls to Paused - use the Reset Polls to Paused function to reopen the polls. This function is most often used as a result of a poll worker error.
Set Date & Time - use Set Date & Time to change the date and time.
Reboot to BIOS - this function is reserved for VotingWorks support staff to boot the machine into the BIOS setup screen for firmware configuration.
Power Down - select to turn off the VxScan.
Unconfigure Machine - select Unconfigure Machine to delete all data and the election configuration.
Save Log File - select Save Log File to save the full log of VxScan activity to the /logs folder on the inserted USB drive.
Retaining and Removing Files - VxCS
VxCentralScan Backup Files
VxCentralScan backup files are saved on election night. This file includes the CVRs and ballot images. If the backup file was not saved on election night, simply go to the Settings menu and select Save Backup.Then Select Save Log File to save the logs.
To remove files from VxCentralScan, select Settings from the side menu and select Unconfigure Machine.
Additional Poll Worker Actions
Pause or Resume Voting
The Pause Voting action in the poll worker screen is generally used by jurisdictions conducting early voting over multiple days or during an emergency situation. To pause voting and not allow ballots to be received by VxScan:
L&A Cleanup
Remove CVRs from VxAdmin
When L&A is complete, select Tally from the side menu, then select Remove CVRs to clear VxAdmin of CVRs to prepare for election day. Confirm by selecting Remove CVRs in the popup confirmation screen. Then select Remove Manual Tallies to remove the manual tallies. Confirm by selecting
Write-In Adjudication
The following steps must be completed by the Election Manager.
Ballots with a write-in bubble filled in or a mark on the write-in line must be adjudicated in VxAdmin after CVRs have been uploaded. To start the write-in adjudication process, log in with an Election Manager Card and select Write-ins from the side menu.
If a contest had write-in votes cast, an Adjudicate x button will appear to the right of the contest. The number indicates how many votes there are to adjudicate. Select Adjudicate x to the right of the contest to start the adjudication process.
Configure VxAdmin
The following steps must be completed by the System Administrator.
For each election, you will configure VxAdmin by loading an election package. VxAdmin is generally compatible with state election file data or a file format provided by VotingWorks. State specific instructions are provided separately.
Opening Polls
Opening Polls on VxScan
After VxScan is plugged in, the Polls Closed screen will show.
Save Election Package
The following steps must be completed by an Election Manager.
Save Election Package
To configure VxScan and VxCentralScan you must first save the election package from VxAdmin to a USB drive. Select Election from the side menu in VxAdmin and select
Setting Date & Time
VxAdmin
Using a System Administrator or Election Manager Card in VxAdmin, select Settings from the side menu. The current date and time is shown under Current Date and Time. The time is automatically updated for Daylight Savings Time. Select Set Date and Time to change.
Printer FAQs
HP Printer FAQ
Do we need to install toner?
New printers come with toner installed by default. The display will alert you when the toner level becomes low, at which point please follow to replace it.
The printer displays "Select Language" and won't print. What do I do?
Configure the printer by responding to the on-screen prompts. You can simply press the "OK" button repeatedly, selecting all the defaults, until it says "Ready."
How do I fix streaks, lines, or otherwise poor print quality?
Print a "Cleaning Page." Navigate through the following options on the printer LCD screen:
Setup
Printer Maintenance
Print Quality Tools
Cleaning Page
Printing the cleaning page will usually clear the printer's rollers of stray ink that is causing print issues.
What if printing a "Cleaning Page" helps, but the issue keeps coming back?
It's possible the paper you are using is not compatible with the printer. When toner doesn't print properly to a page, it can end up on the rollers where it will cause streaks on later pages. Try printing another cleaning page and verify you are using the recommended paper.
If you are using a recommended paper, the toner cartridge may be defective and may need to be replaced.
One copy of the Voting Resumed Report will print. If additional reports are needed, select Print Additional Voting Resumed Report to print more. The Voting Resumed Report and the Voting Paused Report should have the same ballots scanned count.
Below is an example of the Voting Resumed Report.
Printing Previous Reports
If additional copies of a report need to be printed at any time, insert a Poll Worker Card and select No to access the Poll Worker Actions. Select Print xxx Report to print additional copies.
Power Down
To power down the VxScan, insert a Poll Worker Card and select No to access the Poll Worker Actions. Select Power Downto shut the VxScan down.
Remove All Manual Tallies
in the popup confirmation screen.
Alternatively, if you marked results as official, select Clear All Results to remove all tallies. Confirm by selecting Remove All Data in the popup confirmation screen.
Toggle VxScan to Official Ballot Mode
If you used Test Ballot Mode to conduct your L&A be sure to put VxScan into Official Ballot Mode. Insert the Election Manager Card into VxScan to show the Configuration Screen, and select Official Ballot Mode.
If you used Official Ballot Mode to conduct your L&A, simply toggle to Test Ballot Mode and back to Official Ballot Mode to reset VxScan for Election Day.
Remove the Election Manager Card, and confirm that the VxScan is in official ballot mode by ensuring there is no orange Test Ballot Mode banner, Polls Closed is displayed, and the Ballots Scanned count is 0.
A USB drive is required to use VxScan on election day. After testing, you may reinsert the USB drive tested or a new USB drive into the USB slot and seal the machine until a poll worker accesses the machine on election day. If Official Ballot Mode was used, we recommend using a new USB drive for election day.
Toggle VxCentralScan to Official Ballot Mode
If you used Test Ballot Mode to conduct your L&A be sure to Toggle to Official Ballot Mode in VxCentralScan. To change modes, select Settings from the side menu and then Toggle to Official Ballot Mode.
If you used Official Ballot Mode to conduct your L&A, select Delete All Batches to erase all test batches of ballots.
The adjudication process is the recording of what the voter wrote in the write-in space. The contest area will be highlighted for each ballot. Select Zoom Out to see the entire ballot or a larger view of the written vote. Select Previous or Next to move to or go back to a ballot.
The screen will display quick buttons for the official candidates on the ballot. If the voter wrote in an official candidate, simply select the correct one to award the vote to that candidate. If the voter wrote in a candidate not on the ballot, select Add new write-in candidate to enter the name. Once recorded, a button is created for that name and can be selected if written in on another ballot. Select Mark write-in invalid to mark a name not allowed under state law or rule, a stray mark, an empty space, or any other invalid entry as invalid.
As more candidates are added, scrolling will be required to view all selections.
If the write-in is for an official candidate and the system also detects a mark for the official candidate, the following message will appear:
Select Close to return to the contest menu.
Write-in votes without the bubble marked are not included in tally reports until they are vote is assigned via adjudication. Anything marked invalid becomes an undervote if no other votes were marked in a contest.
Load Election Files
When VxAdmin is not configured, the screen will prompt you to insert aUSB containing an election package.
After inserting the USB drive, VxAdmin will automatically list the election package(s) available. Select the File Name of the correct election package to configure VxAdmin.
If the file is not automatically listed, select Select Other File... and manually select the file from the USB drive.
Once configured, the Election screen will display the title and date of your election as well as the date and time VxAdmin was configured.
Remove Election
If you need to change an election package or reset VxAdmin for the next election, you must remove the unconfigure the machine.
Select Election from the side menu and select Unconfigure Machine.
After confirming the removal of the election package and results data, you will return to the initial VxAdmin Election screen. VxAdmin can be reconfigured by loading a new election package by repeating the steps above.
If at any point, the VxAdmin laptop becomes unresponsive, simply press the power button for one second and release. Don't hold the button down. Once the laptop has shutdown, press the power button again to restart.
If there is an orange banner that says "Test Ballot Mode" on the screen, contact your election administrator immediately to prepare the machine for the election.
To open the polls:
insert Poll Worker Card
select Yes, Open the Polls
insert thermal paper
select Print Additional Polls Opened Report to print more reports
The polls are now open. The number of ballots scanned should be zero. Verify the precinct name and election date are correct in the bottom left corner.
Below is an example of the Polls Opened Report. All contest totals should be zero when polls are opened.
Prepare VxScan for Voting
The polls are now ready for voters.
The interior panel should remain sealed and secure at all times unless a poll worker requires access. Any unauthorized access should be reported to an election administrator immediately.
Save Election Package.
You will be prompted to insert a USB drive. Once you insert a USB drive, the screen updates and prompts you to save the election package. Select Save.
No USB drive detected
Save election package
VxAdmin will generate the election package of all ballot styles, saving it automatically on the USB drive. The file is saved inside the /election-packages folder.
This election package is different from the election package used to configure your VxAdmin.
Once the file is saved, VxAdmin prompts you to eject the USB drive. Select Eject USB.
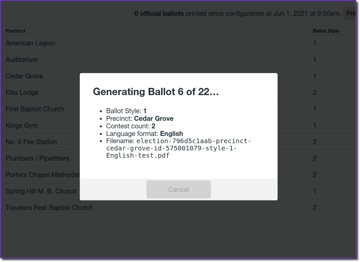
Generating ballots
Eject USB
After a few seconds, VxAdmin will confirm USB ejection and then it is safe to remove the USB drive.
Update the date and time and select Save.
VxCentralScan
In VxCentralScan, the current date and time is shown in the System Administrator screen. The time is automatically updated for Daylight Savings Time. Select Set Date and Time to change.
Update the date and time and select Save.
Mark Results as Official
The following steps must be completed by the Election Manager.
When you are ready to certify election results, you can mark VxAdmin results as Official to print official reports.
You may not add additional CVR files, adjudicate write-ins, or add manual tallies after marking as official so please ensure you are ready to do so!
To mark as official, select Reports from the side menu and select Mark Election Results as Official.
Confirm by selecting Mark Election Results as Official.
All references to unofficial results in VxAdmin will be changed to official. You can print an official tally by selecting Reports from the side menu and selecting Full Election Tally Report.
Packing Up VxScan
Pack up VxScan through the following steps:
Pack up the scanner:
Pack up the ballot box:
Election Manager Settings
CVRs and Logs
Save CVRs - the VxScan Cast Vote Record (CVR) contains the images and the data for each ballot cast and is used to accumulate totals in VxAdmin. This file saves continuously to the USB drive throughout the day and again at the close of polls. However, if that fails or another copy is needed, it can also be saved by selecting CVRs and Logs from the side menu and selecting Save CVRs.
Save Log File - the VxScan Log file includes the system logs.
System Settings
Disable Double Sheet Detection - use to disable the ultrasonic sensor on VxScan in the event it fails and improperly rejects single sheets as multiple sheets. If VxScan stops taking ballots or repeatedly displays the Ballot Not Counted - Multiple Sheets detected error message, contact customer support. This system setting should only be used if advised by VotingWorks support staff.
Set Time & Date - use to change the system date and time. The time is automatically updated for Daylight Savings Time. Select Set Date and Time to change.
Mute Sounds - use Mute Sounds to mute the VxScan system sounds.
Closing Polls
Prepare VxScan
Close the Polls
The polls are now closed.
Below is an example of the Polls Closed Report.
Seals and Port Blockers
VxAdmin
While in storage, the VxAdmin should be stored in its case with numbered pull tight seals through each of the eyelets to the right and left of the carrying handle on the case. These will be removed and tracked when the case is opened for use and new ones should be applied and tracked when packed up for storage.
A tamper evident seal should be placed around the laptop over the micro SD card slot to cover the exposed port and add another layer of tamper evidence to the inner of the laptop in the process.
RJ45/ethernet lockable port blockers should be placed on the exposed RJ45/ethernet ports.
VxCentralScan
While in storage, the VxCentralScan laptop should be stored in its case with numbered pull tight seals through each of the eyelets to the right and left of the carrying handle on the case. These will be removed and tracked when the case is opened for use and new ones should be applied and tracked when packed up for storage.
A tamper evident tape seal should be placed around the laptop over the micro SD card slot to cover the exposed port and add another layer of tamper evidence to the inner of the laptop in the process.
RJ45/ethernet lockable port blockers should be placed on the exposed RJ45/ethernet ports.
VxScan
While in storage, the VxScan should be stored in its case with numbered pull tight seals through each of the eyelets to the right and left of the carrying handle on the case. These will be removed and tracked when the case is opened for use and new ones should be applied and tracked when packed up for storage.
After the VxScan is latched in place during set up, there is a hasp where a pull tight seal can be applied after the user attaches the VxScan to the top of the ballot box. Users should track the numbers on the pull tight seals and removal/application of these seals to maintain chain of custody.
A pull tight seal can also be used on the hasp for the auxiliary ballot bin. Users should track the numbers on the pull tight seals and removal/application of these seals to maintain chain of custody.
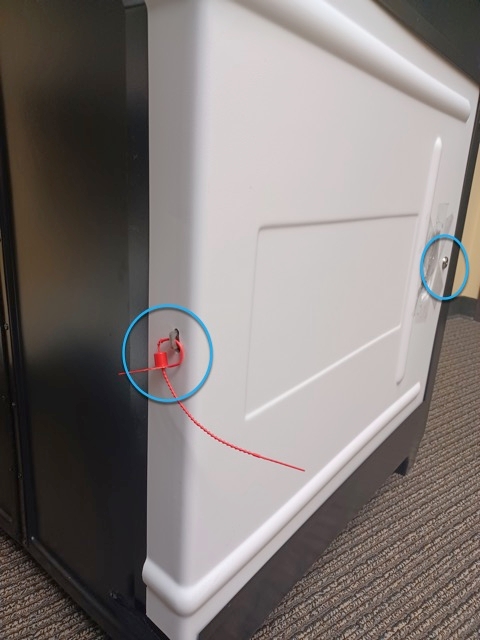
Ballot Box
When the ballot box is set up for voting, the user should apply a numbered pull tight seal to the hasp toward the back of the white sliding ballot bin door. There is also a lock that can be used for additional security. Users should track the numbers on the pull tight seals to maintain chain of custody.
Tally Results
The following steps must be completed by the Election Manager.
Tallying CVRs
All tabulation functionality in VxAdmin is available by selecting Tally from the side menu. Insert a USB drive and select Load CVRs to load the Cast Vote Records.
To tally results, each USB drive from the precincts and VxCentralScan must be loaded. One at a time, insert the USB drive(s). A dialog box will pop up and show you each CVR file saved on the USB drive. Select Load next to the file (official ballots, correct number of ballots, correct time) you'd like to load.
When loaded, confirm that the presented file name, CVR count, and precinct(s) are as expected. Load CVR files from all of your scanners, VxScan and VxCentralScan.
VxScan Setup
Part of the Precinct System, the VxScan scans, stores, and tabulates ballots hand marked by voters or ballots printed by voters via a ballot marking device.
Hardware Overview
VxScan's scanner comes in a tamper-evident case and the ballot box is collapsed.
VVSG TDP Requirements
The following details which section(s) refer to VVSG TDP documentation requirements.
This User Manual in it's entirety maps to Requirement 3.1.5-A. Including A.1 and A.2.
A.3 is covered by,
The hasp on the interior panel door, which provides access to card reader/usbs/printer, should be sealed with a pull tight seal during voting.
A tamper evident tape seal is placed over screws on the top and bottom of the case by VotingWorks during manufacturing. These seals should not be removed. Notify support if evidence of tampering is found.
push the buttons to release and open each case latch
remove the power cord from it's storage place
plug it into the back of the case and into the power back up device
Once assembled, be sure to place the VxScan in an area of the room that allows for voter privacy as voted ballots are inserted into the scanner.
unseal and document the interior panel seal
open the interior panel, insert the Poll Worker Card
select, Yes, Close the Polls
insert a piece of thermal paper into the back of the printer
select Print Additional Polls Closed Report
remove the Poll Worker Card
remove the USB drive
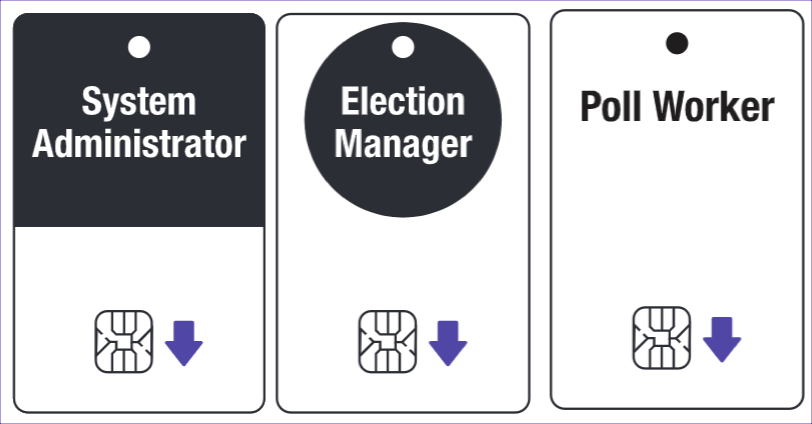
Smartcards and User Roles
The following steps must be completed by the System Administrator.
Overview
Smartcards are used to configure and operate equipment. It's the same technology as the chip in your credit card, but is instead used to provide election administrators and poll workers a secure means to configure and operate the equipment. There are three user roles and cards: System Administrator, Election Manager, and Poll Worker.
System Administrator Cards
System Administrator Cards allow an election administrator to load an election definition, program smartcards, and remove the election definition from VxAdmin. This card is also used to perform software updates on all machines.
System Administrator Cards should only need to be used at the very beginning and very end of an election. Keep this card in a secure location when not in use and in between elections.
Election Manager Cards
Election Manager Cards allow election administrators to use central system devices and configure precinct system devices. Election Managers are responsible for:
preparing machines for L&A
centrally scanning ballots
configuring precinct equipment
Election Manager Cards should only be used by election administrators and should be kept secure at all times.
Poll Worker Cards
Poll Worker Cards allow poll workers to manage election day precinct tasks, including:
opening the polls
closing the polls
printing precinct tally reports
Every precinct will need at least one Poll Worker Card in order to operate the polls.
Creating Cards
For each election, you will create Election Manager and Poll Worker Cards specifically for that election. Smartcards can be created quickly and easily with VxAdmin, by logging in with a System Administrator Card and selecting Smartcards from the side menu.
You will use the smartcard reader in the lower lefthand side of your VxAdmin laptop to program a card. Simply insert the card of your choice and select the correct button for the card.
When creating an Election Manager Card, the screen will provide you with a unique PIN for that card. Keep the PIN secure. When creating a Poll Worker Card, the screen will simply confirm the card is created.
To create an additional System Administrator Card or reset the PIN, select Create System Administrator Cards from the Smartcards screen.
From the System Administrator Cards screen, insert a System Administrator Card into the card reader.
If a PIN already exists, a Reset Card PIN button will appear. If the card is not programmed a PIN will be generated.
Unprogramming Cards
If a card has already been programmed, when you insert the card into the card reader, a prompt to Unprogram Card will be displayed. Select the Unprogram Card button to clear the card.
Reports
Full Election Tally Report
To review results, select Reports from the side menu and select Full Election Tally Report. A preview will appear. Select Print Report to print the report, Export Report as PDF to save the election tally report to a USB drive as a .pdf file, or Export Report CSV to save the election tally report to a USB drive as a .csv file. Files will save to the reports/ folder on the USB drive.
The printed report should look like the image below with the election name and the VotingWorks logo.
The Tally Report will include any total write-in count of one or more in a contest. If a specific write-in candidate has enough votes to be considered in the outcome of a contest, the report will list that candidate and their vote total. The Tally Report will not list every write-in adjudicated, the Write-In Adjudication Report will have the full list.
Tally Report Builder
The tally report builder enables custom reports. These reports can be filtered or reported by precinct, district, ballot style, and more. To create a custom tally report, select Reports from the side menu.
Select Add Filter
Select Ballot Style, Batch, Precinct, or Scanner
Specify any specific ballot style(s), batch(es), precinct(s), or scanner(s)
Select Add Filter to add an additional filter as needed
Select how you'd like the report organized
Ballot Count Reports
Ballot count reports show the number of ballots cast. The ballot count report builder enables you to generate custom reports by precinct, district, ballot style, and more. An example of the Precinct Ballot Count Report is on the right.
Ballot counts are recorded by type. Manual are counts recorded in the Manual Tally process, BMD are ballots from the VotingWorks ballot marking device, and HMPB are ballots hand marked by a voter and processed via VxScan or VxCentralScan.
Write-In Adjudication Report
The write-in adjudication report presents how all write-ins were adjudicated and the count of votes for write-in candidates.
To print the report, select Unofficial Write-In Adjudication Report. An example of the Write-In Adjudication Report is on the right.
COTS Hardware
VotingWorks equipment uses commercial off-the-shelf (COTS) components when possible. The printers, scanners, and laptops are items that can be purchased online or at an electronics store. COTS equipment tends to be more reliable, affordable, and transparent than customized hardware. Details about each component are below.
HP Printers
VxAdmin prints reports with the HP m4001dn printer.
Toner
New printers come with toner pre-installed, see the for replacement options. To install a new toner cartridge, follow .
Feeder Tray
The primary, bottom input tray (Tray 2) has a paper capacity of 150 to 250 pieces of paper, depending on the thickness of the paper. If you are reloading paper often for large printing jobs, a can be purchased for a 400 to 550 capacity. Follow to install the feeder.
Scanners
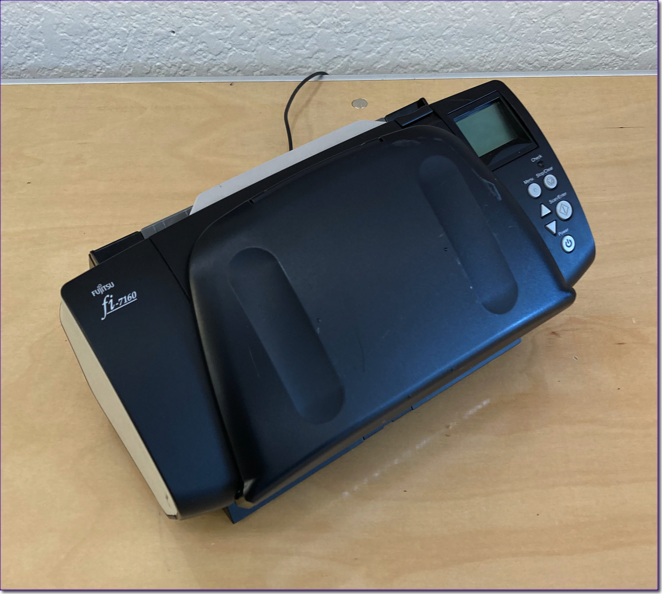
Fujitsu Scanners
VxCentralScan comes with the scanner, capable of scanning almost one ballot per second. We recommend using the scanner with the stacker (a.k.a output tray) down and fully extended, the stopper flipped up, and the detachable paper chute attached and fully extended:
For more detailed instructions on how to set up the scanner, consult the product .
Clean the fi-8170 before each election and after every 5,000 sheets scanned to maintain peak scanning accuracy. VotingWorks provides a alongside the fi-7160. The kit contains a copy of the and the cleaning fluid, cloths, and swabs.
VotingWorks also supports the larger fi-7600 scanner. The operator's guide can be found .
VxScan Kiosk Scanner
VxScan uses the document scanner as its scanning unit. Unlike the Fujitsu scanners used for central scanning, the Custom scanner is installed into VotingWorks equipment and should never be removed.
The Custom Scanner A4 should be cleaned prior to every election. VotingWorks recommends cleaning during Logic and Accuracy testing. To clean the scanner, follow the step by step instructions included in the Specifically, apply a small amount of isopropyl alcohol to a microfiber cloth and gently wipe the two pieces of glass exposed when the scanner is opened. This procedure can also be safely performed at the polling place in the case of a scanner malfunction.
Laptops
VotingWorks uses laptops with an integrated card reader for central system laptops.
Supply List
Ballot Printing in Bulk (From External Printer)
When using a third party printer, VotingWorks recommends printing ballots on paper between 28# Bond (105 GSM) - 65# Cover (177 GSM) for the best voter experience. The commonly available paper weights in this range are:
28# Bond (105 GSM)
32# Bond (120 GSM)
100# Text (140 GSM)
40# Bond (150 GSM)
90# Index (162 GSM)
65# Cover (177 GSM)
If printing ballots, in addition to the paper specifications above, be sure to do the following:
print at 100% scale (don’t adjust)
ensure that all ballots print properly with completely black timing marks (boxes bordering the ballot) and QR codes with no visual imperfections
Thermal paper for Tally Reports
VotingWorks delivers a starter pack of thick custom thermal paper with every VxScan. Currently, this paper can only be ordered directly from VotingWorks for $1.50 / sheet. Use this to order more.
Off the shelf, thinner thermal paper may also be used (please note it lacks printed directions about which side to insert face up) like this:
Marking Utensils
There is no specific recommendation for a marking utensil but it should be an ink pen that dries quickly. No markers.
Seal & Port Blocker Requirements
The VxScan, ballot box, and VxAdmin and VxCentralScan cases should be secured with tamper evident numbered pull-tight seals like this:
or
VxAdmin and VxCentralScan micro SD slots should be secured with transfer tamper evident sticker seals like this:
VxAdmin and VxCentralScan laptop ports should be blocked with port blockers like this:
VxScan cleaning supplies
To clean the scanner, we recommend cloth cleaning sheets like this:
And standard isopropyl alcohol 70%+, like this:
You can also use a microfiber cloth with isopropyl alcohol for direct cleaning, like this:
Toner Cartridges
The HP printers for the VxAdmin (if purchased) use toner cartridge 58. HP offers two sizes:
- regular size, prints approximately 3000 pages
- high yield, prints approximately 10000 pages
USB Drive Recommendations and Compatibility
USB drives can be ordered directly from VotingWorks via the . must be used.
Larger capacity drives may be necessary when scanning large volumes (over 10,000) of ballots on VxCentralScan.
Assisting Voters
Casting Ballots
VxScan is ready to accept a new ballot whenever it displays Insert Your Ballot.
A voter can then push their ballot onto the tray and into the scanner. When a ballot is properly inserted, the scanner will grip the ballot. If a ballot is inserted at an angle, the scanner may push the ballot back into the voter's hands without scanning, the voter should simply re-insert their ballot. VxScan will then scan the ballot by pulling it in and show the following screen.
If the ballot has no issues, the ballot will go into the ballot box and the screen will show that the ballot has been counted. Notice the Ballots Scanned count goes up.
After a few seconds, VxScan will return to the Insert Your Ballot screen in preparation for the next voter.
If the ballot was not counted because of an issue, the scanner will push the ballot back toward the voter but maintain a grip on it. There could be any of the following issues with the ballot depending on state law or rule.
Overvoted Ballots
If the scanner recognizes more than the allowed number of votes for a particular race. For example, a voter marked two candidates in a race where they must make a single choice. The voter should select Return Ballot and VxScan will return the ballot to the voter to place in the auxiliary ballot bin. If a state allows an overvote to be cast, an additional selection of Cast Ballot as Is will appear. All valid votes will be counted in other contests but the overvoted contest will be excluded.
An overvote will also be detected when a candidate is marked and writing is detected on the write-in line for the same contest if it exceeds the number of allowed votes (when required by law or rule).
Blank Ballots
If a state requires notification to the voter that a ballot has no selections marked (blank), the voter will be promoted to review their ballot.
The voter may have circled or underlined the names of their choices instead of filling in the bubbles. Or the voter may have used a writing utensil whose marks are ignored by the scanner, like a red-ink pen. VxScan will warn the voter that their ballot appears blank.
If the voter would like to correct their error, they should select Return Ballot and VxScan will return the ballot to the voter. If the voter would like to count the ballot as is, they should select Cast Ballot As Is and then confirm by selecting Yes, Cast Ballot As Is. No votes will count on a blank ballot.
Undervotes
If a state requires notification to the voter that a specific contest has no selections marked (undervote), the voter will be promoted to review their ballot.
If the voter would like to correct their error, they should select Return Ballot and VxScan will return the ballot to the voter. If the voter would like to count the ballot as is, they should select Cast Ballot As Is and then confirm by selecting Yes, Cast Ballot As Is. Votes for all contests with valid votes will be counted.
Multiple Corrections
If a voter has both undervotes and overvotes on their ballot and the state requires review of both, the Review Your Ballot screen will appear. Select View contests to see each contest that was undervoted or overvoted.
If the voter would like to correct their errors, they should select Return Ballot and VxScan will return the ballot to the voter. If the voter would like to count the ballot as is, they should select Cast Ballot As Is and then confirm by selecting Yes, Cast Ballot As Is. Votes for all contests with valid votes will be counted.
Adjusting Color and Size
Simple changes to the screens color and size can be very helpful for voters with low vision. Selecting Color/Size in the upper right hand corner of the screen provides the voter with different options.
Select Color to change the background and/or text color and select Text Size to change the text size.
Configure VxScan
The following steps must be completed by an Election Manager.
Before you configure VxScan, you must setup the machine. Follow the steps in the .
To configure VxScan, you must do two things:
VxScan Error Messages
VxScan is programmed to intuitively explain to a voter or poll worker problems that may occur with a ballot or the VxScan. The following is a list of potential error messages and the actions a voter or a poll worker should take to remedy the error.
Error Message
Voter Action
Poll Worker Action
Pre-Election Setup Checklist
To prepare for an election, complete the following steps:
Retain Previous Election Files
If all files were saved on election night or post-election, skip to Remove Previous Election Files.
L&A Testing Checklist
Complete all steps in the Pre-Election Setup Checklist prior to L&A Testing.
VxScan
VxCentralScan Hardware Setup
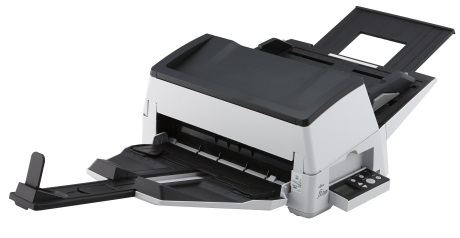
Part of the Central System, VxCentralScan is used by local election administrators to rapidly scan ballots.
Hardware Overview
VxCentralScan is a commercial off-the-shelf (COTS) laptop pre-installed with VxCentralScan software pre-installed and a Fujitsu scanner.
Two models of Fujitsu scanners are supported: fi-8170 and fi-7600. The smaller fi-8170 (shown above) can scan batches of up to 30 ballots. The larger fi-7600 (shown below) enables larger batches of up to 100 ballots.
Election Night Checklist
On election night, you will need (laptop and printer). if scanning ballots centrally, you'll also need the (laptop and scanner) and the .
and Saving Results
Configure VxCentralScan
The following steps must be completed by the Election Manager.
Ballot Not Counted - Multiple sheets detected. Remove your ballot and insert one sheet at a time.
Remove the ballot sheets and insert one sheet at a time.
If the error repeats, contact your election administrator to review double sheet detection settings.
Ballot Not Counted - Test ballot detected. Scanner is in official mode.
Ask a poll worker for help.
Issue the voter an official ballot. Contact your election administrator if you do not have official ballots.
Ballot Not Counted - The ballot does not match the election this scanner is configured for.
Ask a poll worker for help.
Verify the correct ballot was issued to the voter. Contact your election administrator for the correct ballots.
Ballot Not Counted - The ballot does not match the precinct this scanner is configured for.
Ask a poll worker for help.
Contact your election administrator for the correct ballots or to change the precinct on the VxScan.
Ballot Not Counted - The ballot is jammed in the scanner.
Ask a poll worker for help.
Clear the ballot jam from inside the ballot box and have the voter reinsert their ballot.
Ballot Not Counted - There was a problem reading this ballot. Please scan again.
Remove the ballot and scan again.
If the ballot continues to be unread, spoil the ballot and issue a new one to the voter.
Card is Backwards
Remove the smartcard, turn it around, and insert it again.
Internal Connection Problem
Ask a poll worker for help.
Reboot the scanner. Insert the Poll Worker Card, select No, and Power Down, then replug in.
If the error continues to display, contact your election administrator to check internal cord connections.
Invalid Card - Remove the card to continue.
Contact your election administrator for a new Poll Worker Card.
No Power Detected
Ask a poll worker for help.
Plug power cord into a live outlet.
Remove Your Ballot - Another ballot is being scanned.
Remove the ballot and wait for the previous ballot to be counted.
VxScan's ballot box capacity is 2500 ballot sheets. If the ballot box reaches capacity, ballots should be removed and secured according to state law and rule.
Ballot Not Counted
Remove ballot and scan again.
Ballot Not Counted - Live ballot detected. Scanner is in test mode.
Ask a poll worker for help.
Contact your election administrator, scanner is in test mode.
tallying CVRs
adjudicating write-ins
entering manual tallies
printing and saving results
Smartcards
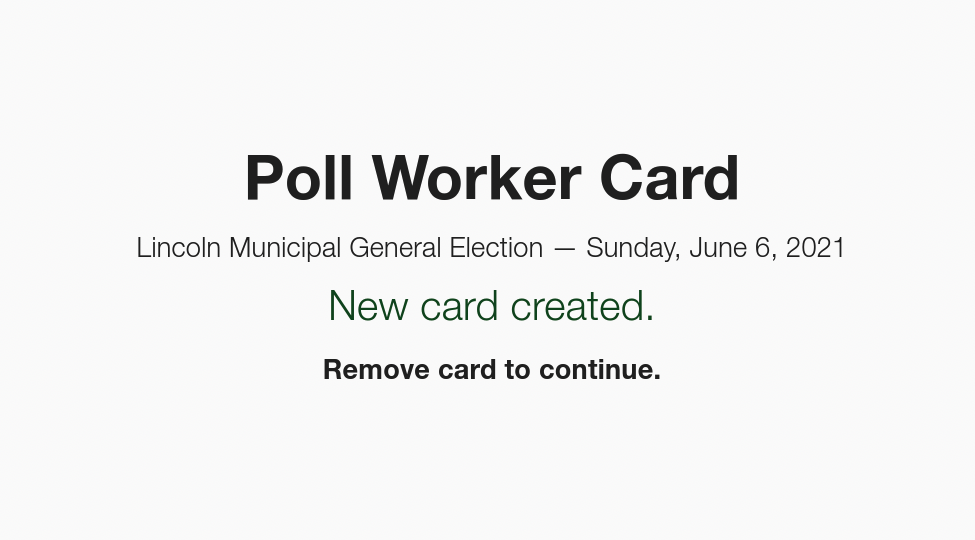
Election Manager Card confirmation screen with PIN
An unconfigured machine will prompt you to insert an Election Manager Card to log in and then a USB drive with the election package saved from VxAdmin to configure.
Only one USB drive should be plugged into VxScan at a time. The other USB port is designed as a backup in the event of a failure.
After you insert the USB drive, VxScan will automatically begin loading all ballot styles for the election. After the election package is done loading, the Election Manager Settings screen will display in Test Ballot Mode.
Setting Mode
Use the toggle button to switch between Test Ballot Modeand Official Ballot Mode. The machine must be in Official Ballot Mode on Election Day. Review the L&A Overview instructions to understand which mode to use during L&A testing.
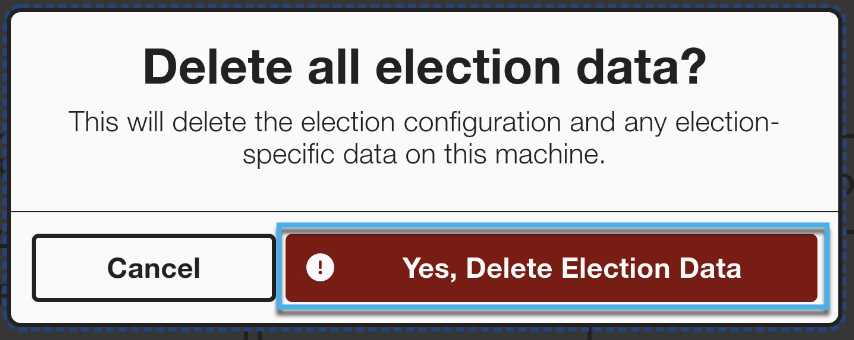
Remove Election Data & Configuration
There are two ways to remove the election package, unconfigure the machine, and delete all data on the VxScan.
To remove election configuration (and all data) from VxScan with the Election Manager Card:
To remove the election configuration (and all data) from VxScan with a System Administrator Card:
You can now re-configure VxScan with a different election package.
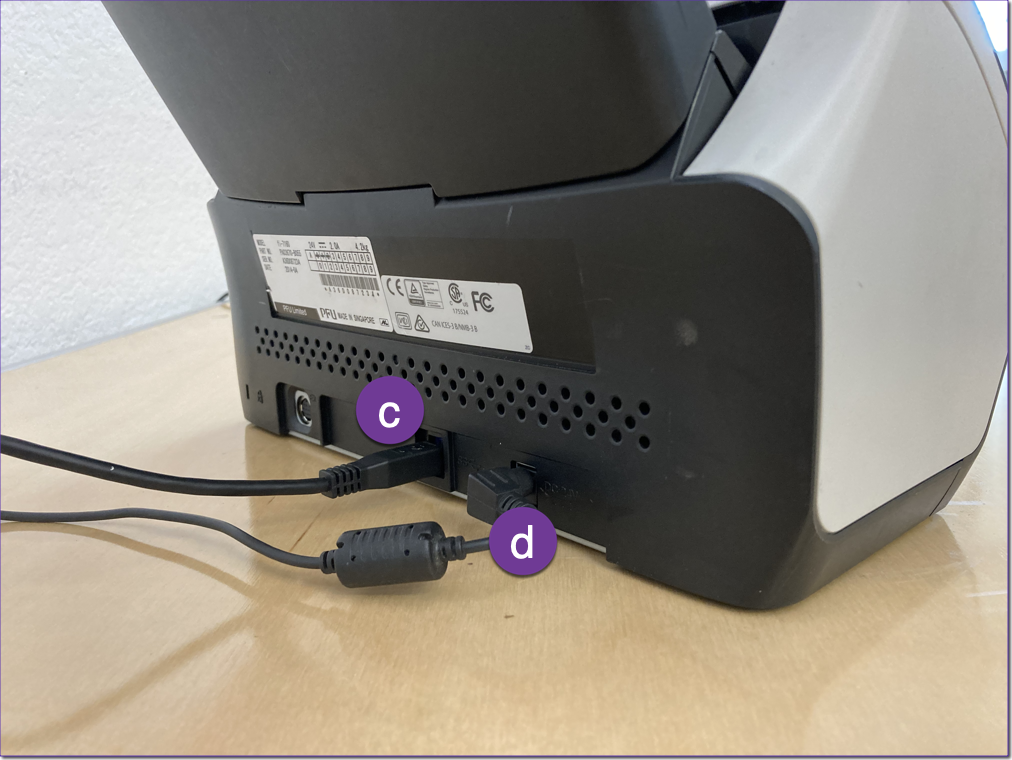
VxCentralScan can be set up through the following steps:
Unbox and Setup Scanner:
Remove scanner and power cord from case
Attach and pull out paper trays
Plug cords in
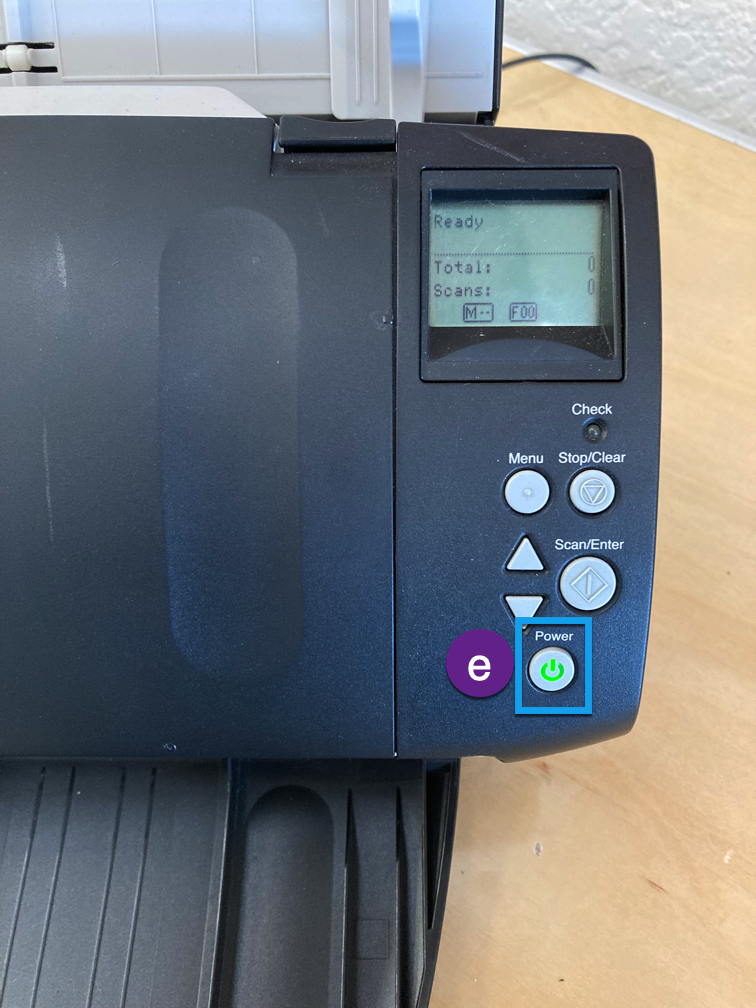
Press the power button to turn on
2. Setup VxCentralScan laptop:
remove and document seals as necessary
lift the latches
Remove laptop
Remove components
Plug components in
VxCentralScan hardware setup is complete.
Packing Up VxCentralScan
To pack up the VxCentralScan, simply place all of the components back into the case as displayed above and package the batch document scanner. Secure the laptop case as required by placing at least one seal through the eyelets highlighted below.
VxCentralScan in cases
VxCentralScan set up
from VxAdmin
to a USB drive.
Load Election Package
Once the election package is saved to a USB drive, you can load the file to VxCentralScan.
Setup the VxCentralScan hardware and turn on the VxCentralScan laptop. Insert an Election Manager Card to configure VxCentralScan will be displayed.
Using an Election Manager Card, unlock the machine. Then follow the prompt to insert the USB drive with the election package. The election package will automatically load.
VxCentralScan is now configured and in Test Mode. The screen will show No ballots have been scanned and election summary information (name, date, jurisdiction, etc.) will be shown in the bottom left corner of the screen.
VxCentralScan is now ready for scanning.
Remove Election
To remove an election package and reset VxCentralScan:
You can now re-configure VxCentralScan with a different election package.
VxCentralScan may also be unconfigured with a System Administrator Card and selecting Unconfigure Machine from the System Administrator screen.
If at any point, the VxCentralScan laptop becomes unresponsive, simply press the power button for one second and release. Don't hold the button down. Once the laptop has shutdown, press the power button again to restart.
VxAdmin is configured with an election package (see Configure VxAdmin), which specifies the details of the election as well as various settings for the system. This page documents the format of the election package.
Overview
An election package is a ZIP file containing a number of JSON files:
election.json - The election definition (contests, ballot styles, etc.)
systemSettings.json - Settings for the various machines
metadata.json - Documents the election package version
There may also be a few other files present that are not used in v3.1:
appStrings.json, vxElectionStrings.json - Translations of voter-facing content
audioClips.jsonl, audioIds.json - Audio recordings of voter-facing content
Election Definition (election.json)
The election definition utilizes a customized version of the NIST Ballot Definition Common Data Format (CDF), which is specified here:
PDF:
Web-friendly UML:
The VotingWorks election definition format (vxCDF) modifies NIST CDF in a few ways:
It uses only a subset of the objects and fields defined in NIST CDF
It extends the format with some additional fields to support data that is not included in NIST CDF
For documentation of the fields used in vxCDF, refer to the schema: .
System Settings (systemSettings.json)
The system settings uses a custom JSON format to define additional settings for the machines.
The system settings file uses the follow schema:
Retaining & Removing Election Files
Retaining Election Files
After certification of an election and before configuring a new election, all election files and data should be saved and election package removed from the previous election.
VotingWorks recommends retaining the following files after each election:
Note: Ballots should have been secured post-tabulation. Follow state guidelines to ensure proper retention.
VxAdmin
To save the recommended VxAdmin files, follow these steps when logged in as an Election Manager:
Select Reports from the side menu, select Full Election Tally Report, select Export Report PDF.
Then select Export Report CSV.
Next lock the machine and log in as a System Administrator. Select Settings from the side menu and Save Log File. Machine log files are saved in the /logs folder on the USB drive.
VxScan CVR Files
VxScan CVRs include the VxScan's CVRs and ballot images. The log file contains the logs. To save the VxScan files, without the ballot box and follow the following steps:
Insert Election Manager Card
Select CVRs and Logs from the side menu
Insert a USB drive
Log files contain records of user interactions with the machine (e.g., election officials and poll workers unlocking the machine, voters casting ballots, etc.) as well as internal system information (e.g., the status of paper running through the scanner, errors, etc.). .
Removing Election Files
In VxAdmin, log in with a System Administrator Card, select Election from the side menu and select Unconfigure Machine.
In VxScan, insert an Election Manager Card and select Unconfigure Machine.
Central Scanning
The following steps must be completed by the Election Manager.
VxCentralScan is a central scanning solution that allows you to quickly scan large batches of ballots. If you are using VxScan at your precincts, you can use VxCentralScan to scan absentee or vote by mail ballots on Election Day and mail, provisional, military ballots, or other ballots counted post-election day post-election. VxCentraScan can also be used to quickly verify a test deck and retabulate an out of balance precinct.
Follow the instructions to prepare the system for use.
Before scanning the first ballot batch, confirm that VxCentralScan displays No ballots have been scanned. If not, select Delete All Batches to clear the scanner.
Load a stack of ballots into the feeder tray of the scanner. VotingWorks recommends loading no more than 50 ballot sheets at time. The ballots need to be in a neat stack, unfolded and lying flat, but ballots can be in any orientation (e.g. upside down or backwards is fine).
Select Scan New Batch. Ballots feed through the scanner automatically and the number of ballots scanned will increase as each ballot is scanned under Ballot Count. A timestamp will appear under the Finished At header when a batch is done scanning.
Once the batch finishes scanning, remove it from the output tray on the scanner and place the next stack of ballots in the feeder tray. Repeat the scanning process until all ballots are scanned.
If a batch needs to be rescanned, use the Delete button to remove the original scan.
Adjudicate Ballots
VxCentralScan will stop scanning and present a review screen if scanning cannot be completed due to a blank sheet, overvoted or undervoted contest, scan mode mismatch, or an otherwise unreadable ballot sheet. The review screen will display an image of the scanned ballot sheet, the reason why scanning was stopped, and confirm that this ballot sheet has not been tabulated yet.
Blank & Overvoted Ballots
If the scanner stops, remove the last ballot sheet scanned from the scanner output tray and confirm it matches the ballot sheet displayed onscreen. Once removed, follow review requirements. If the ballot needs to be reviewed by someone not operating the scanner or needs to be duplicated to be tabulated properly, select Remove to Adjudicate and confirm that the Ballot has been removed. Once confirmed, the scanner will resume scanning ballots in the batch.
The example below shows an Overvote detected that is being removed for review.
A similar central review interface may be shown for other adjudication reasons depending on your election configuration including:
Blank Ballot
Undervote
Unreadable Ballots
VxCentralScan may show an Unreadable ballot screen for a properly marked ballot if it's unable to decode ballot information due to page skew, dust, or tampering of the ballot. When a ballot sheet is shown as unreadable, you can safely remove the ballot and re-scan the ballot sheet. If the ballot is unreadable on a second scan, you should remove the ballot for duplication.
Mode Mismatch
A mode mismatch error will appear if the scanner mode (Test or Official) does not match the ballot type (Test or Official) and the scanned sheet will not be tabulated. In these cases, you should either remove the ballot from the stack or switch scanner modes.
Saving Cast Vote Records (CVRs)
When all ballot batches (including any duplicated ballots) have been scanned, you will need to save the CVRs from VxCentralScan to load into VxAdmin for tabulation.
To save, select Save CVRs in the top right.
You'll be prompted to insert a USB drive. Once recognized, select Save and then Eject USB.
Select Save
Select Eject USB
The CVRs will be saved in the cast-vote-records/ folder on the USB drive.
Once you've selected Eject USB, you'll see a prompt to Close and may remove the USB drive.
If using multiple VxCentralScan stations, repeat for each one.
Save Backup
After saving the CVRs, VotingWorks recommends also taking a backup of all data from the VxCentralScan station. To save a backup, navigate to the Settings menu and select Save Backup. Then navigate to the USB drive in the file dialog and save the backup .zip file. The file may take up to a few minutes to save.
Once saved, select Eject USB and remove the USB drive from VxCentralScan.
Tabulated ballots should be sealed into a secure container post-tabulation with the seal number recorded as required. Follow state guidelines to ensure proper retention.
Single polling place jurisdictions may want to skip to the at this time to verify CVRs were properly saved before packing up equipment
Pack up the scanner:
Pack up the hard-sided ballot box:
Pack up soft-sided ballot box:
Last updated October 14, 2024.
Manual Tallies
The following steps must be completed by the Election Manager.
To enter tallies manually, select Tally from the side menu and select Add Manual Tallies.
Enter the Ballot Style, Precinct, and Voting Method of the ballots being added and select Add Tallies (this step will be repeated for any additional ballot styles and voting method).
remove and document the scanner case seal(s)
one copy of the Polls Opened Report will print
close the case lid
remove all ballots from the auxiliary bin and secure for tally
Enter the Total Ballots Cast and then distribute the votes accordingly, noting undervotes and overvotes as well as votes cast for a candidate. If a vote is for a write-in candidate, select Add Write-In Candidate to enter the name found on the ballot and add a tally. Repeat this step for all contests. Select Save Tallies after entering all contests.